Showing posts with label pattern drafting. Show all posts

Friday, September 30, 2022

Waiting on a Rainbow (with a little sewing on the side)

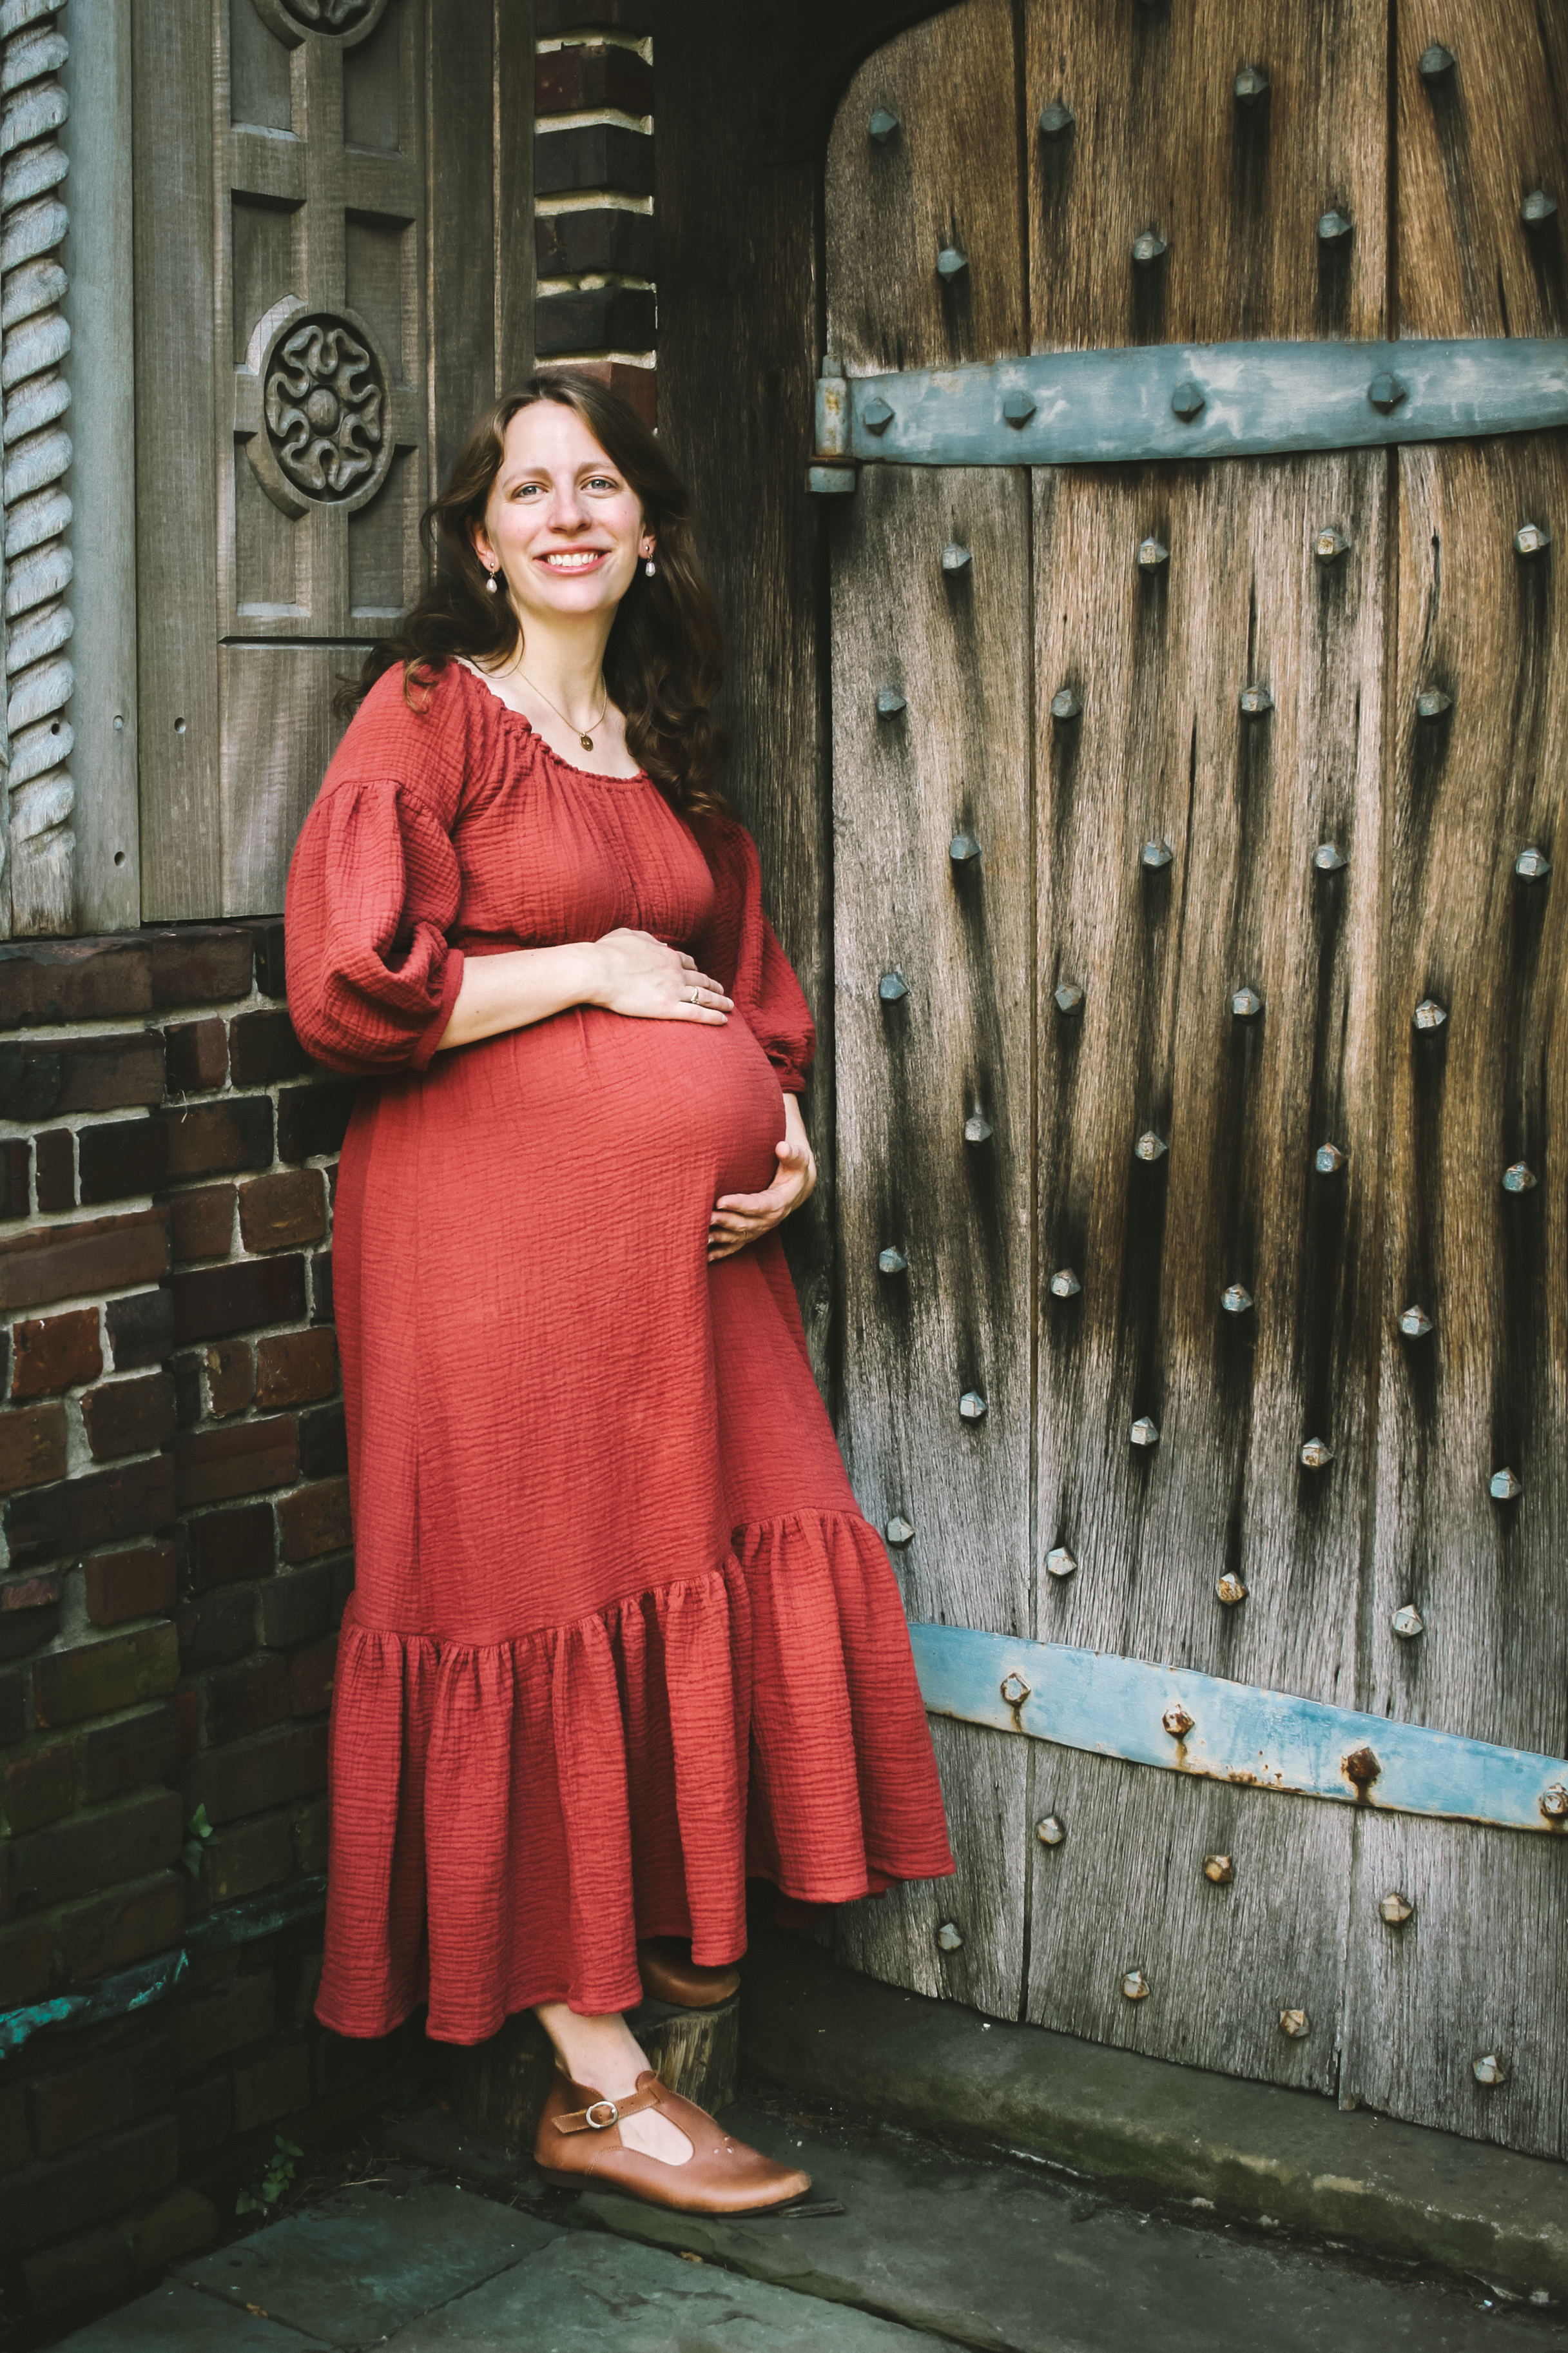
I had every intention of getting some maternity photos with this pregnancy around 34-35 weeks -- after all the heartache we've been through in the last four years, this "rainbow" pregnancy was certainly something to commemorate. And I've always regretted not getting decent bump photos with most of my babies (only Little Man has a handful of "maternity" photos, taken in my parents' back yard -- my goodness, my husband and I look like babies ourselves!). I knew exactly what I wanted to wear, the absolutely lovely "Eliza" dress from Emme Mama. The only problem was the price tag...it's hard to justify spending more on a cotton gauze everyday dress than I did on my silk wedding gown, even though it's a company I'd love to support because of their ethical manufacturing. I decided to try my hand at drafting my own dress, and even made a trial run before we moved (which was a significant help, as it turned out). 

And then our house needed more renovations than anticipated (well, not all of them were needed), and our shipment was delayed by a month... As you can imagine, sewing a new dress was hardly my top priority when our belongings finally showed up. I finally managed to squeeze in some sewing, and finished my "knock off" dress just before 37 weeks. Cutting it a bit close, wouldn't you say? Though during the delay, I remembered a local museum that has the loveliest grounds. It turned out to be the perfect setting, and we all wished we could stay longer (we were trying to find the happy medium between closing time and golden hour, so our visit was a bit rushed). I suppose we'll just have to go back! 


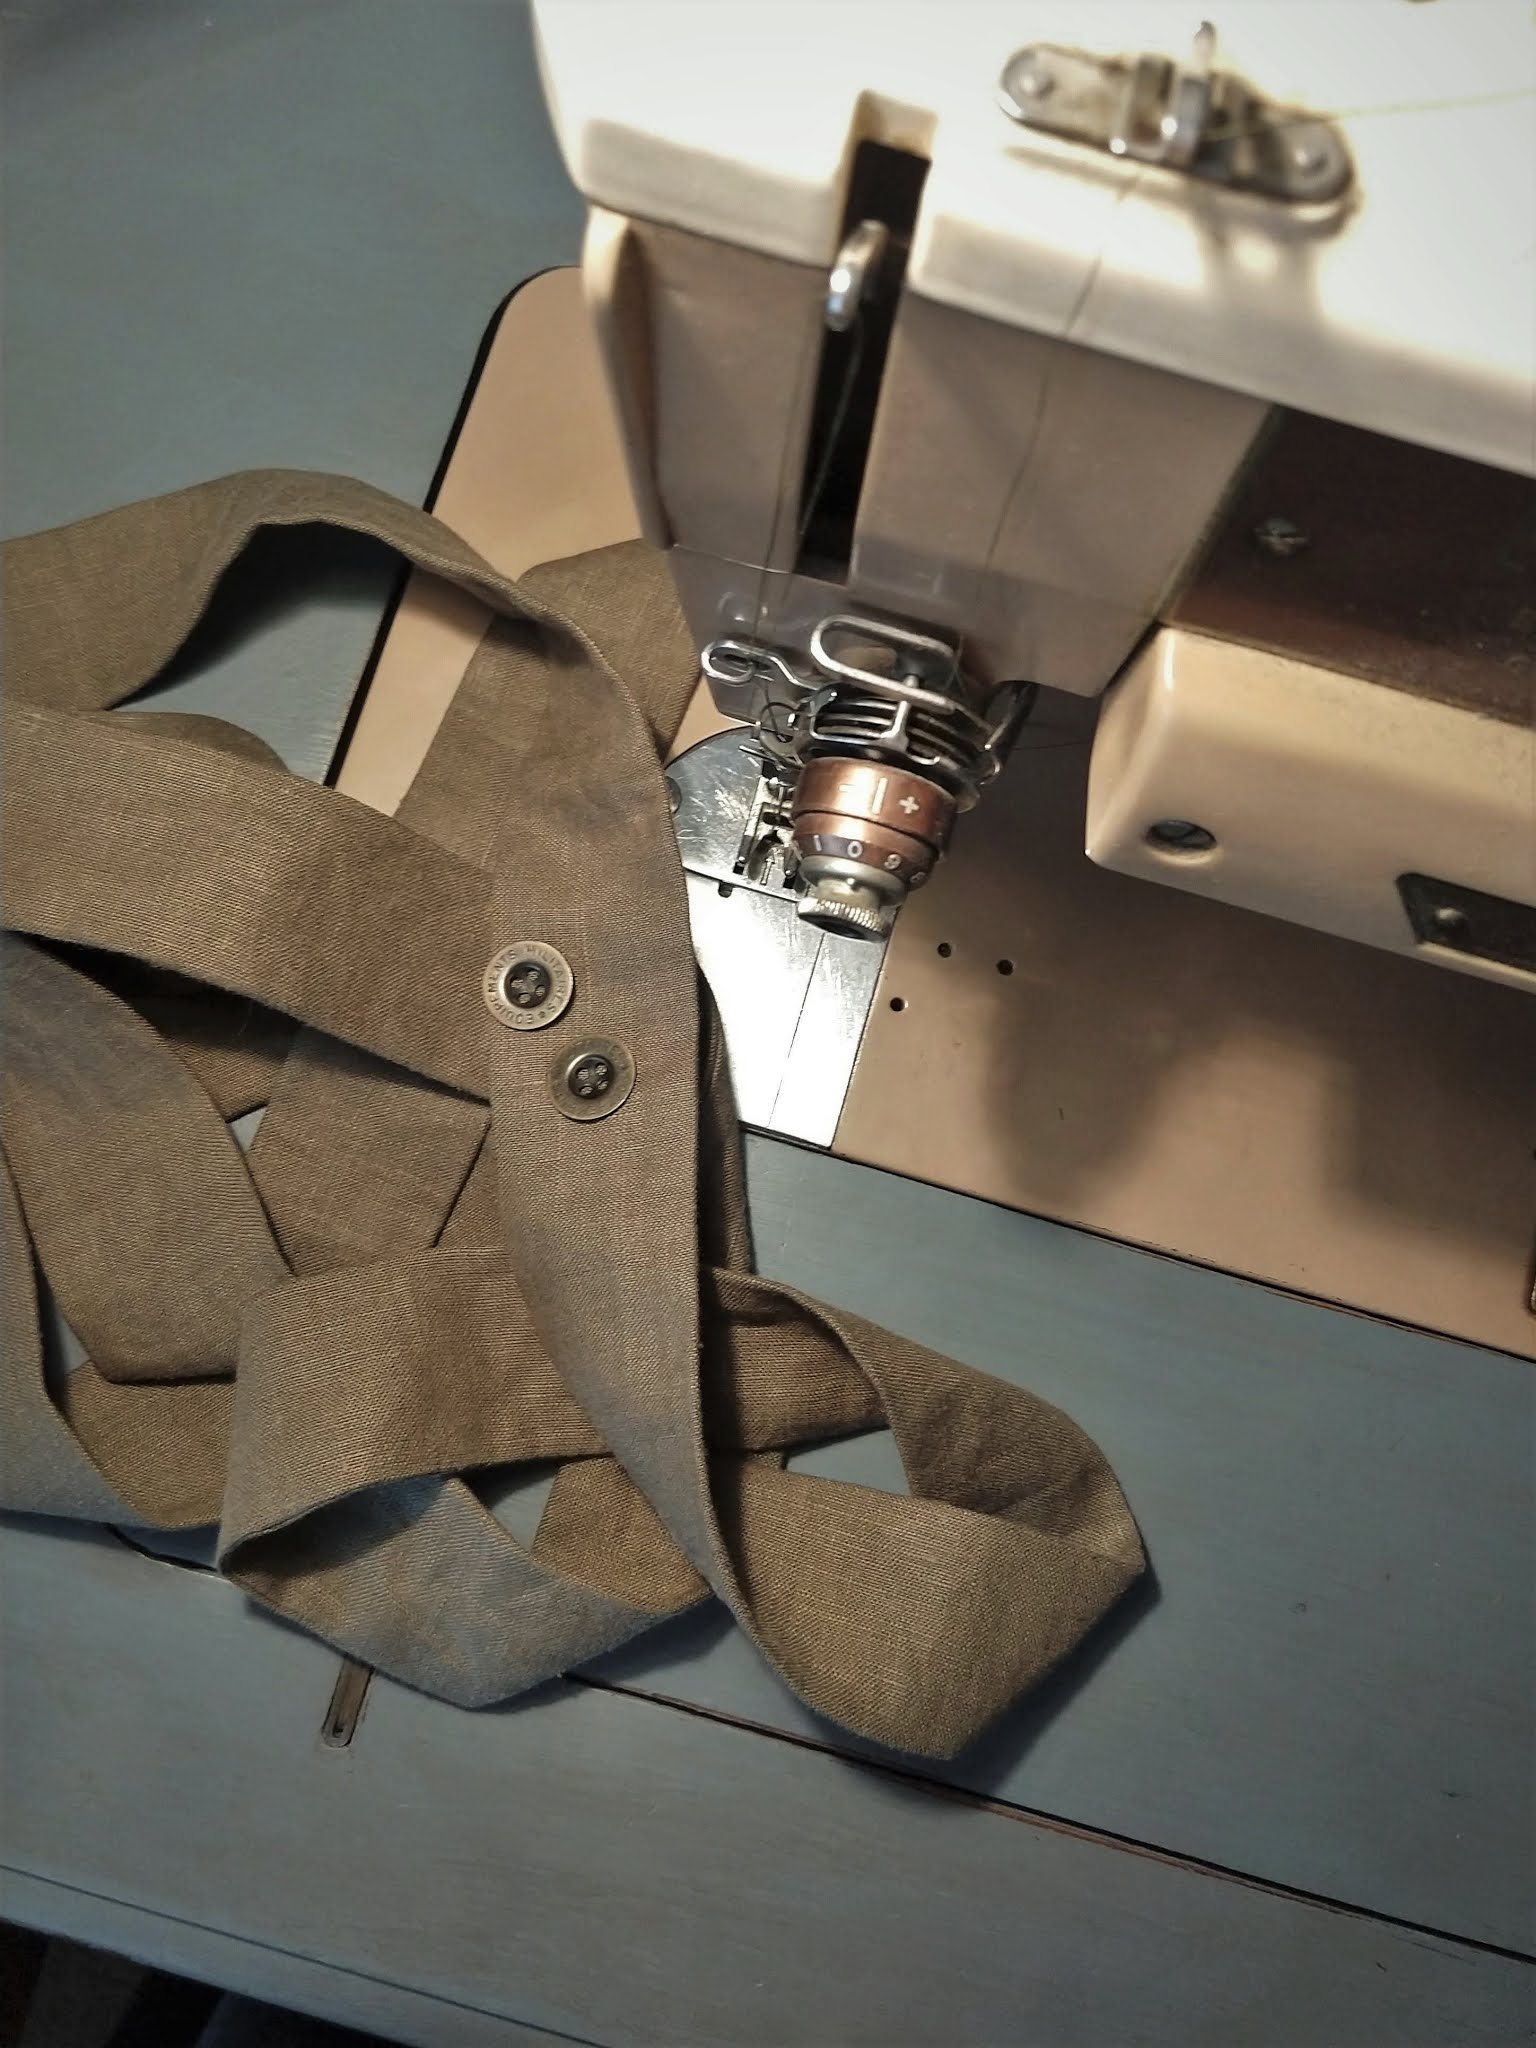
Back to the dress details:

Even with some experience to guide me, I had to tweak (and tweak, and tweak again) to get the fit right. After the first try-on, I had to reduce the length/circumference of the puffed sleeves and hack almost eight inches off the skirt -- which meant removing and reattaching the ruffle. At which point, I realized that the ruffle just wasn't full enough, and still a bit too long. So it was removed again, expanded to include an extra length of fabric, and re-hemmed. 


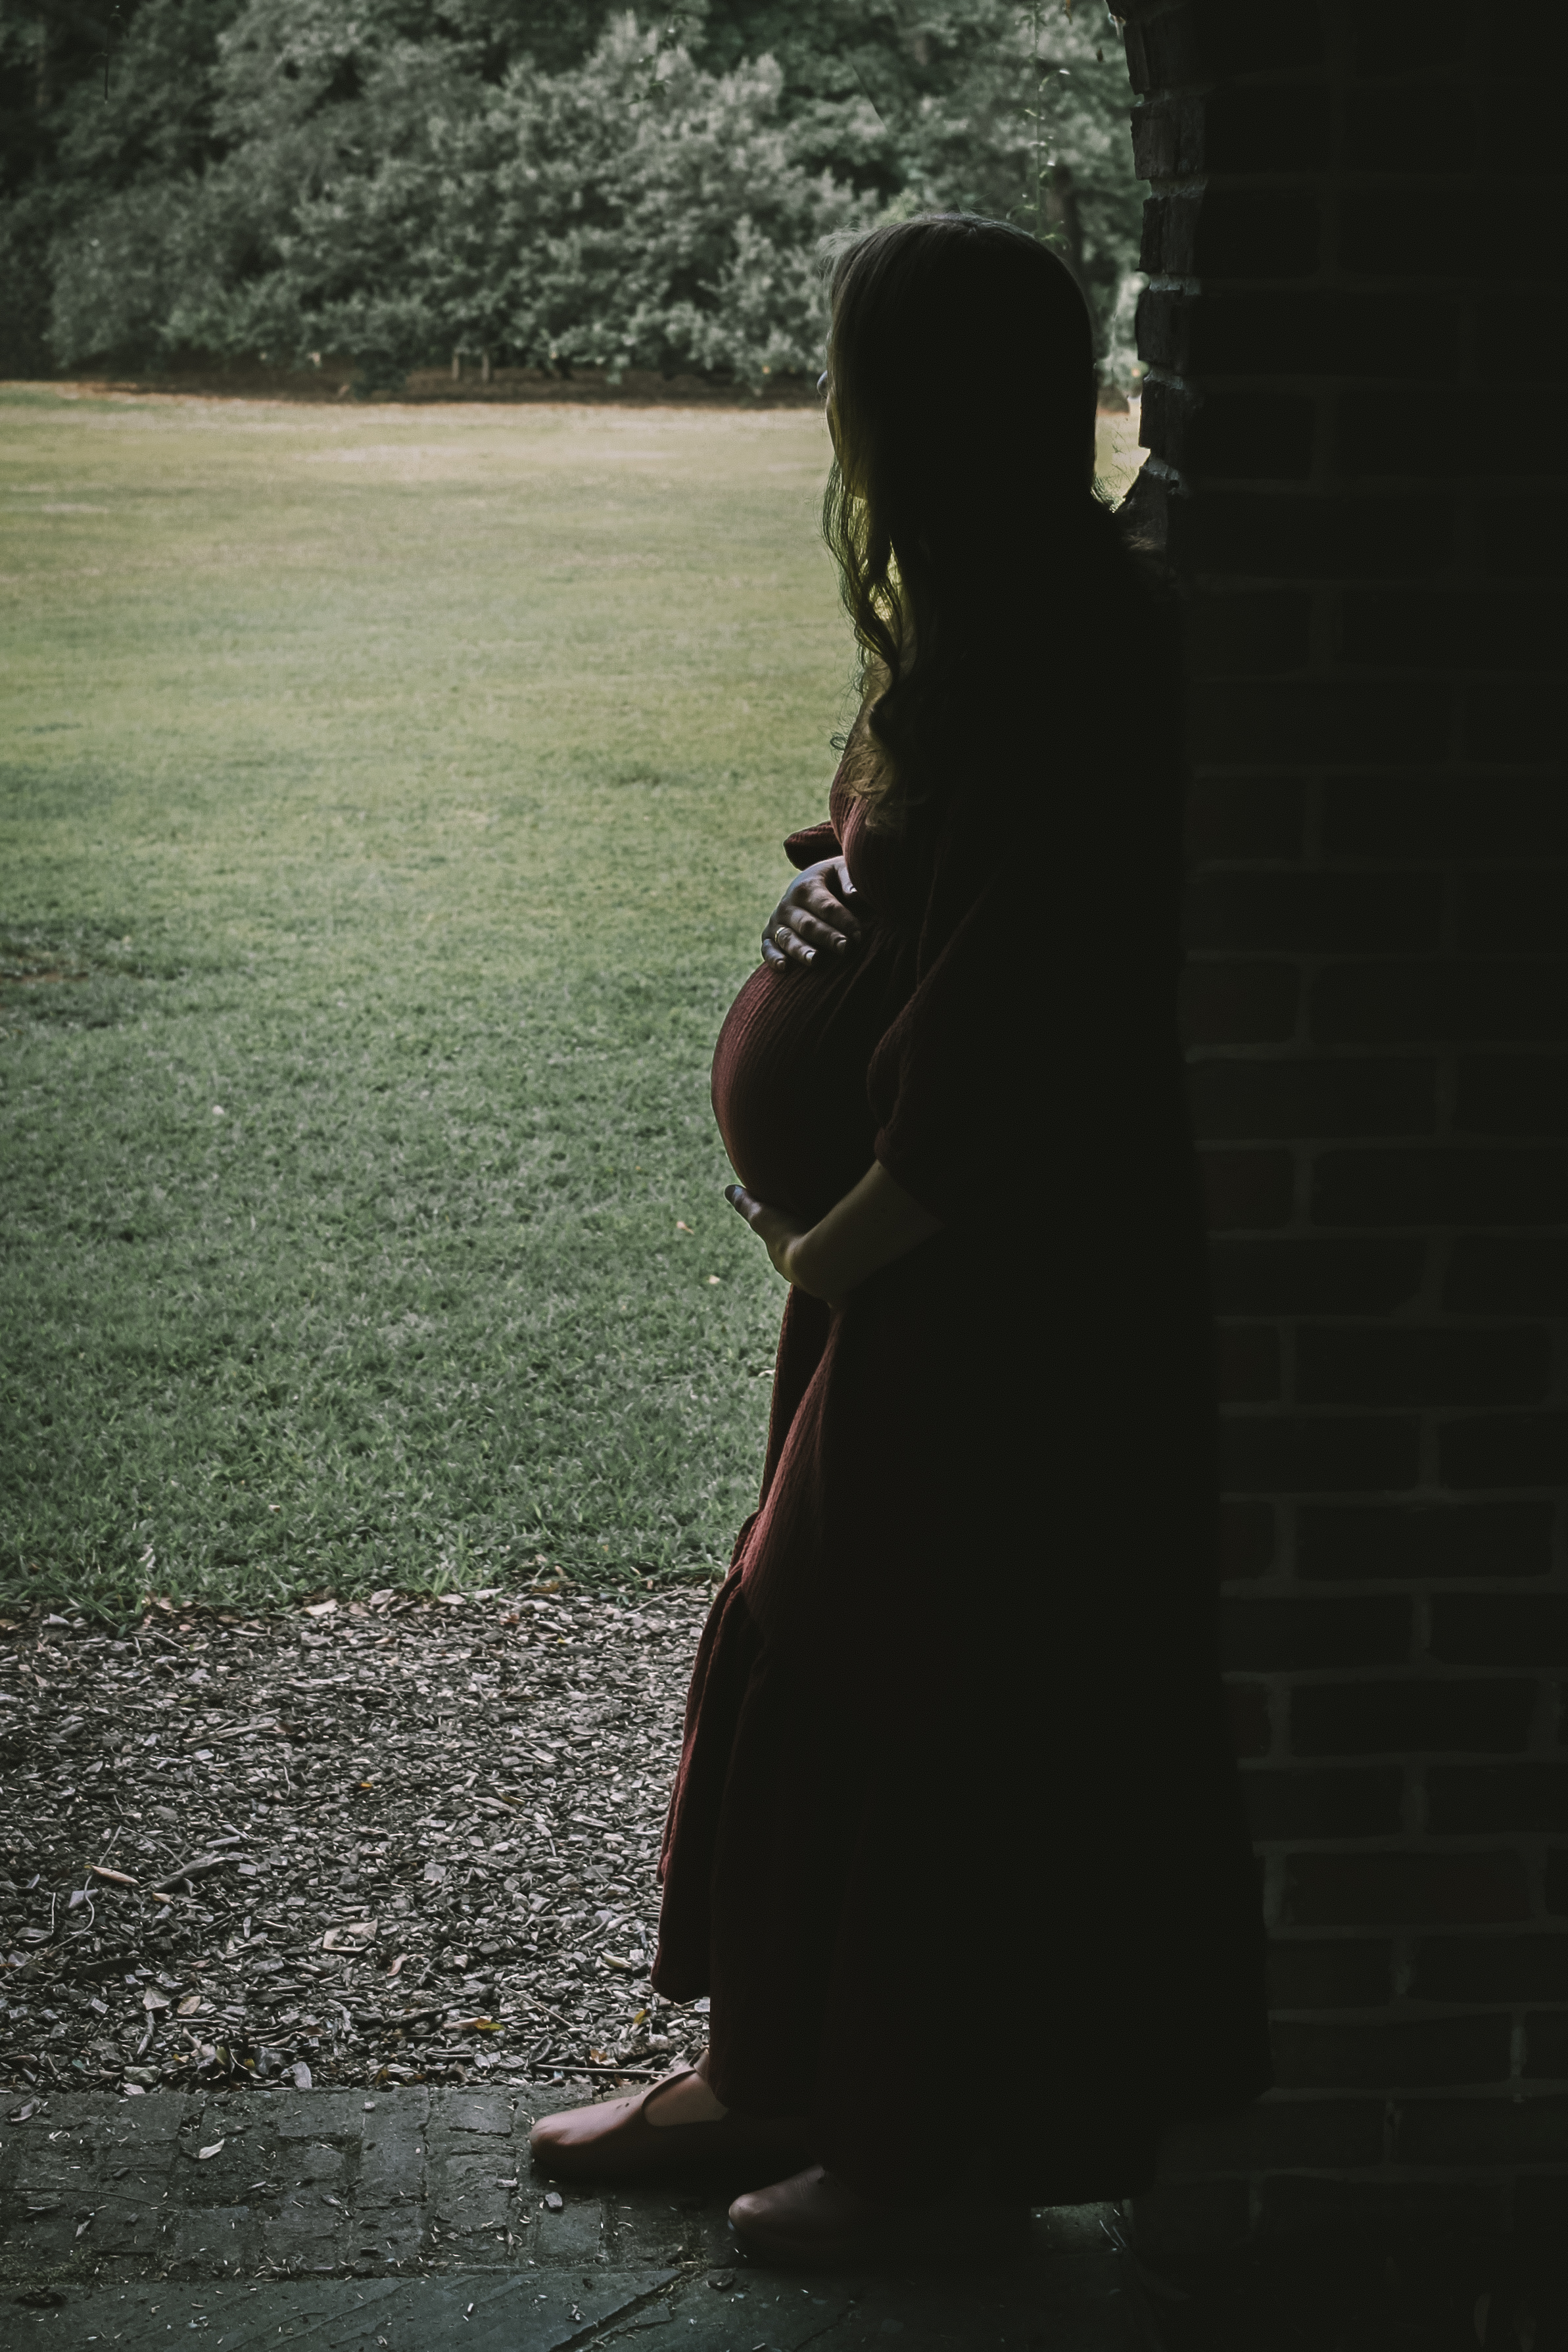
I feel a bit narcissistic posting so many photos of just me (and Kit, by default!), but I've omitted photos with my husband and children for the sake of privacy. I promise that the rest of the family was involved; the littles have been so excited to welcome a new baby to the family, and it was truly sweet to capture memories with them as we all anticipate this little rainbow's arrival.

It seems foolish to make a maternity dress only a few weeks from delivery! But it should prove a boon during that awkward postpartum stage (and beyond, for that matter); it's insanely comfortable and nursing friendly. Besides, it has a decidedly autumnal flair, so I suppose it wouldn't have been ideal for the blistering summer we've had.

I found my cotton gauze on Etsy -- the five yards I purchased yielded the dress with plenty to spare (in fact, I've already made a wee pair of Misusu Olli pants and a bandana bib for Kit with the leftovers, and still have a yard or so left). It washed up beautifully, with a slightly squishy texture. In the end, the fabric cost about a fourth of the "inspiration" dress...considerably more budget friendly.


I debated hiring a photographer for a maternity shoot, but in the end I'm glad it was just us -- I didn't need or want a whole album of photos, especially since there are only so many ways to pose with "the bump." But I did want to capture a few memories of a season that's come after so much waiting and prayer. Thanks to my in-house photographers (i.e., my husband and oldest son), a tripod/remote, and a bit of help from Lightroom, we were able to do just that. We even managed to get a full-family photo, which is a bit of a shock considering how many people and how little time we had. *wink*


It's surreal to be here, in the final days before we meet this sweet boy, Lord willing. My heart overflows with gratitude for the Lord's undeserved mercies in bringing us to this point. So many times as we walked (stumbled? crawled?) through the valley of grief and recurrent loss, I wondered if the clouds would ever part. The darkness seemed so consuming and so endless at times. It's true, the scars of loss will never fully heal on this side of eternity -- I will always be a mama missing her babies until He wipes away my tears for good. And let me be quick to say that a "rainbow baby" was not the inevitable outcome of our valley sojourn, nor the only way God could bring healing and hope to our hearts. But I am so grateful for this little life, this tiny soul who has already brought so much joy to our family. He is not a "replacement" for the sweet babies we lost; he is a precious gift entrusted to our care. A gift that we do not take for granted.

We're ready to meet you, Little Kit! 

Wednesday, June 15, 2022

Streams of Mercy, Never Ceasing

We're nearly there -- just a few more days before we start the long trek back east. 

While I don't think we could ever tick every box off our bucket list, we did fit in one last visit to a favorite spot, this fairytale oasis tucked away in a nook of the desert. Of all God's glorious creations, waterfalls were one of His best ideas, I think. I never leave this place without feeling refreshed, in both body and soul.


If I look a bit hot and disheveled, that's because I was! The hike to the falls
isn't long, but it's all uphill in the sun on a toasty day. 


The water is so clear, and deliciously cool. Anything green is a novelty, and I think this is the only spot we've seen moss out here! This was probably the nicest visit yet for me, because Scout is now old enough to move about by himself -- lots of slippery rocks and a steep drop off about forty feet from the base of the falls make it a bit nerve-wracking with a toddler. This time it was more visual rather than hands-on supervision, and I could enjoy myself and the other littles more. I've just realized I've never posted about this particular spot, and I don't quite know why?


On the way back down, we met up with a local, who allowed me to get quite close before he dashed away to "safety." 


24 weeks with this little miracle. We're now at "viability," when the baby's chances of survival outside the womb climb dramatically (and continue to climb with every week). While we've never had issues with preterm birth, it's still a relief to reach this milestone. The mist of the falls and the rush of the water were reminders of God's endlessly flowing mercies, as I savored sharing this final visit with our sweet baby.


This dress must be my fourth or fifth "last project before we move." I just couldn't let my sewing motivation go to waste, and knowing that my machine will be packed up for nearly a month probably added to my desperation. Technically I did throw together a few new demi-camis after I finished this, but this was essentially my last project!


Rather than trying to do shirring on the waist,
I made a casing and used five strips of 1/4" elastic.


Using a peasant blouse pattern as a base, I drafted my own pattern. I really want to recreate the out-of-my-budget Emme Mama dreamy Eliza dress in cotton double gauze, so this was a bit of a test run (though I did change some elements to better suit this printed rayon gauze). I was worried I'd need a lining because it's described as semi-sheer, but happily it's opaque! It's the perfect maternity and nursing dress, and so, so comfortable. 

 I had barely enough fabric, since it arrived in two two-yard pieces. The ruffle ended up a bit shorter than planned, but in the end it all worked out. I did do a fair bit of tweaking after the fact, because I think I overestimated the sizing a bit -- it's hard to know how big the bump will get, you know? I do wish I'd put the waistband a bit higher, but I decided to leave it; not only was the elastic a nightmare to feed through, but I think it will sit perfectly fine post-bump. As a seamstress I have to remind myself sometimes that if I bought a dress off the rack, it probably wouldn't fit just so. Being able to tweak and tailor is a bonus when I've already reached my goal of a wearable garment. If I do get to make a double gauze version, I'll have that much more knowledge under my belt.


And now, I suppose, I should really get back to the finishing touches before packers arrive tomorrow...


Saturday, June 26, 2021

Paper or Plastic?

If you've been here long, you know that I love linen! And apparently I did pretty well in the husband department, because mine brought home a meter of olive linen from a port call in Croatia while he was deployed. But that deployment was five years ago, and still nothing had materialized (look at me pun!) from that gift.

I just couldn't bring myself to cut into that gorgeous linen! A meter is not enough for a dress (or even most skirts), but I wanted to make something special with it. This summer my goal has been to use up some of the yardage languishing in my craft closet, and I knew I really should start with this piece. Taking inspiration from some of the skirts on my Pinterest board, I decided on a paper bag style skirt. None of the patterns I saw met my criteria, so I worked out a few details and started cutting. 


I mean, why not take huge risks with a fabric you're terrified of wasting? *wink* 

I knew I wanted a wide sash and a faux opening with buttons up the front. Most of my other decisions were driven by my fabric limitations! Fortunately it was a 60" wide piece and linen doesn't have a definite "direction," so I turned it sideways. 


The top edge is folded down to make the paperbag "ruffle," but I added a muslin strip for the casing (which is not visible) so I could get as much length as possible. I opted for tidy French seams on the inside, and everything went swimmingly. At last, I put the elastic through and tried it on before adding the finishing touches.

It was too big.

Hilariously so, except that the emotion I felt was more akin to desperation! I wanted plenty of "leg room," so I'd cut it out too generously -- I didn't realize that was even possible, considering how little fabric I had to work with. But as someone with a barely-defined waist, the amount of fabric around my hips was atrocious. The wide elastic I used was also curling dreadfully, and looking rather bunchy.


Lots of seam ripping later, I took out several inches from the side seams and then made a double casing with two narrower pieces of elastic. I tried it on again. Much better (and the elastic was perfect), but now there was a distinct "poof" at the center back... I didn't want to make the bottom width any smaller, so I crossed my fingers, uncrossed them so I could wield my seam ripper and shears yet again, and added a sloped seam to the center back (taking fabric out of the waist but not the hem). The problem with all of this was that I had no idea if my alterations worked until I had done a significant amount of re-construction. I really, really did not want to seam rip anything else, and honestly had no clue what to do if this last alteration failed.

Happily, it was a success! I spent another half hour on finishing details (this would have been a one-day project if it hadn't been for the fit issues...grrr). I've been wanting a skirt like this for ages, and I'm so pleased with the color, fit, etc. While a bit narrower than I would have liked, it's short enough that is doesn't restrict normal movement and I think this will be a favorite piece in my wardrobe. 


Thursday, July 30, 2020

Citrus Sherbet Socks

I'm a bit late posting these, considering I finished them in May -- but it's been that kind of year, hasn't it? 

Laddie was next up for socks, and I decided to try dyeing yarn for his socks. I'm still figuring out the "perfect sock," in terms of fiber and weight. I found Dyer Supplier to be a wonderful resource, as they actually sell non-superwash wool yarns! They're quite inexpensive, too, which made me more willing to experiment with dyeing. I settled on organic merino Tilandsia fingering. I've read mixed reviews of merino as a sock yarn, but again -- experimenting.


Laddie helped me dye his yarn -- the beauty of dyeing with KoolAid is that it's non-toxic! I wish I'd had more of the lemonade to make a darker green (in retrospect I could have added a smidge of food color), but the orange came out nice and bright. A few zaps in the microwave set the colors. 


After dyeing the green, we spread out the skein and "poked" it with forks dipped in blue and orange dye -- the speckle effect worked perfectly! 


When it came to knitting, I ended up devising my own pattern based on stitch counts from other fingering-weight patterns. I did have to start over shortly after getting through the heel, as they were coming out too narrow (they still look narrow, but Laddie has skinny little feet!). Simple ribbing on top helps with the fit, and I wanted something simple that wouldn't distract from the color contrast. I also used the Fish lips kiss heel again, and I doubt I'll ever use another! 


Laddie thoroughly enjoyed helping me dye his yarn, and was delighted to have some hand-knit socks of his own. Now if I can just keep them out of the washer and dryer... 


Thursday, October 17, 2019

Selfish Sewing: The "Medieval" Maxi

When I came across Wren and Ivory's Reese dress, I was in love! I'd been wanting a maxi dress or two for fall -- in fact, I purchased a Mother Bee maxi dress from Amazon a few months ago (while it's advertised as maternity it works as a "regular" dress, too). I am trying to purchase as little new clothing as possible because I am troubled by the ethics of most ready-to-wear garments, but happily both Mother Bee and Wren and Ivory make their clothes in the USA. Still, I knew I could make a dress for about half the cost of the Reese dress (and I wanted a higher neckline, anyway), so I decided to give it a go.

I picked up some wine-colored brushed polyester jersey, and set to work with great trepidation -- I drafted the pattern myself based on measurements from my Mother Bee maxi dress (a bit challenging, as it's a wrap-front dress). I was truly amazed by how well it went together. I had to make very few adjustments, and the whole process of pattern drafting, cutting, and construction took about a day. Admittedly, I had more time for sewing that day than I usually do...


This dress is incredibly comfortable to wear, and feels so feminine. My husband has dubbed it my "medieval" dress, probably because of the sleeves! I didn't vary much from my inspiration dress, though I did add ties to the back (I like being able to customize the fit) and changed the neckline construction to make it easier to sew. I think I raised the neckline a tad too high, but at least I won't be worrying about wardrobe malfunctions.


I'm a bit torn, because I feel like I've betrayed my love for natural fibers (linen is easily my favorite fiber for fabric, and wool for knits) -- but I must say, the brushed poly is dreamy, easy to care for, and feels like I'm wearing pajamas! Maybe I'll try a rayon or bamboo jersey in future.

It was lovely to sew something for myself, as I've been mostly knitting and my sewing has been limited to very practical things (such as mending) lately. It's giving me all of the cozy Fall vibes, too! I hope you're enjoying a taste of this lovely season in your corner of the globe.


Thursday, April 12, 2018

Reborn

A recent thrifting expedition yielded some very satisfying results -- for $3, I brought home a silk smocked dress for Rosa (she and Little Man call it her "Scottish dress" because of the plaid pattern!), a men's large henley shirt, and a men's XXL heathered cotton sweater. And considering that I ended up getting five garments out of those three pieces, I'm quite pleased with that expenditure. Don't worry, I didn't hack up the silk dress!

First up, the men's henley. It had contrasting sleeves, which was the perfect opportunity for an outfit. The bodysuit came from the shirt, and the pants and trim from the sleeves! I used Jalie 3133, with a few minor modifications (most notably, adding a bit to the crotch to accommodate cloth diapers, and slightly adjusting the crotch closure method). I've used this pattern once or twice before, and like the results! I just need to remember to make the leg openings higher on the side next time -- they really do come down a bit too far.


For the pants, I used the existing sleeve cuffs for the bottom leg openings and traced a self-drafted pants shape. I tried a new "extra room" technique by adding a gusset between the front and back (you can see this idea more clearly in this pair of pants). It does seem to provide some extra room, and it's not a noticeable addition. For the waist, I folded over the top waistband allowance and sewed the elastic straight in. I've had trouble with elastic folding over in my casings lately, and this method solved that problem!


I harvested the original shirt's neck ribbing, too! I should have cut the neck opening a little larger and stretched the ribbing a bit more (it bags a little), but I can get it over Scout's head and that's all that really matters.


I've already shared one of the projects I got from the men's sweater, but the dungarees I made did not use up the whole sweater! I still had the sleeves, and that was enough to get another pair of pants: 


 Again, I used the existing sleeve cuffs for the leg openings. The ribbing from the sweater waist serves as the waistband (I'd only used half of it for the dungarees). These were intended as pajama or "lounge" pants, which is probably good considering that Scout is so mobile now that he has actually crawled out of these. The cotton ribbing at the waist is not really strong enough, especially as it starts to "relax" during wear.


I may go back and change the waistband so they don't slide off -- but look how comfy they are! At least my model is happy, if a bit squirmy...


I find upcycling unwanted clothing so satisfying -- remaking a discarded garment into something custom is an exciting challenge! And when the stakes are so low (worst case scenario, I've wasted a dollar), it's more relaxing than using expensive fabrics. Really, the only limiting factor for me is time. I think I'd make almost all of my children's clothing if I didn't have... well, children! *wink*


Sunday, March 25, 2018

Handmade Christmas

So, I might be a little late in posting this (what's three months amongst friends?), but I had to share some Christmas projects!

I'll start with my favorites -- A dragon dress-up set for Laddie. Little Man and Rosa have accumulated some dress-up, which Laddie shares, but I wanted him to have something of his own. And he loves dragons, so it was an obvious choice. Also, the perfect opportunity to try out a few patterns I'd been eyeing for several years!


Here's a quick round-up of the patterns I used:

I used a combination of red fleece and red "scale" fabric from JoAnn's cosplay collection -- I was sure the shiny "scales" would be perfect, and I'm quite pleased with how it all turned out! Sewing with that fabric was a nightmare, but tissue paper seemed to help. The only downside is that I have a feeling the scale fabric will not be very durable, and that may result in my having to re-make the dragon softie in the future.


The dragon softie (which we dubbed Bartholomew, or "Bart" for short) was quite time consuming, but it was my first time working with such a detailed stuffed animal. Also, I forgot to interface the wings! 

It's hard to get a good shot of a very active toddler (and red is such a hard color to photograph!), but Laddie absolutely loves his costume and wears it frequently. It cracks me up every time to see him chasing his older siblings with that tail! The wings are a favorite of mine, and were surprisingly easy to make. Thankfully we had a metal hanger on hand (which provides the structure for the wings). 


And then, of course, there are the Christmas pajamas! The kids open these on Christmas Eve and wear them that night. The patterns are just simple shapes (I made everything except Little Man's shirt), usually drafted from an existing garment that fits them.

I spotted the Curious George fabric at Wal Mart, and knew immediately that I would make Laddie's pants out of it -- he is obsessed with Curious George, and even has a stuffed "Georgie" that he sleeps with. I was going to purchase a tee at JoAnn's during one of their 5 for $10 sales, but the smallest sizes they had were still far too large. So I bought a men's XXL and used the fabric to make a smaller tee!  By using the t-shirt's existing hems and reusing the ribbed neckline, it was very easy to put together. I added a little fussy cut patch pocket, and made a tiny pair of pants for Laddie's stuffed Curious George. First time I've ever measured the rise and inseam for a monkey...


For Little Man's pajamas, I used a JoAnn's tee and added a chambray pocket. He loves vintage planes, and I'd scored a little applique patch on clearance for $0.50 a few years back. I had some vintage plane fabric leftover from when I'd made sheets for his nap mat (also years ago!) that I used for his pants. I was worried he'd be disappointed that he'd seen the fabric before, but he was actually thrilled that I'd made pajama pants out of it!


Rosa got a simple peasant top with a pair of flannel pants (hedgehogs!), along with a matching nightgown for Baby Ella (a Bitty Baby American Girl doll that my parents gave me about 27 years ago). The coral fabric is actually the same that I used for a maternity top a while back. 


Christmas may be long gone, but these little projects have been well-used since then, and that I will count as a success! I keep waiting for the time when the littles are less-than-excited about Mama making things for them, but so far... well, I'm counting my blessings!


Friday, March 23, 2018

Done-garees

Don't get me wrong -- "overalls" is a perfectly serviceable word. But why settle for serviceable when you can say "dungarees" instead? Whatever you choose to call them, I've been eyeing the sweet, petite, knitted variety for some time now.


They're a dime a dozen in European or European-inspired boutiques -- but the problem is, a dozen would actually set you back quite a few dimes! More dimes than this mama can justify. There are plenty of knitting patterns, too, but my knitting "queue" is already backlogged, and there's that whole instant gratification thing. Or at least, more instant than my tortoise-rate knitting. 

Enter, the charity shop! No, sadly, I have yet to find anything remotely similar second-hand. But the racks are stuffed with extra-large men's sweaters, and they'll do just as nicely (with a "little" bit of restyling). 


I drafted the pattern off of the pattern I'd recently made for Scout's harem pants, making adjustments for a bib. Really, this was rather winged -- I'm surprised it turned out! I'd definitely change a few things (shorter/narrower bib, longer rise), but overall I'm very pleased with the outcome. And considering that the sweater I upcycled was only $1, it's almost ridiculous how inexpensive they were. I even got a pair of pants out of the sleeves, so the dungarees were really only $0.50.

The bib and back edge are faced, and I added some elastic to the back waist edge. Gotta emphasize that svelte baby figure!


I got the idea for the suede leather straps from this Zara pair, and added buttons to both the bib and the back so I can remove the leather for washing (you can actually wash leather suede in the washing machine -- and dry it! -- as Little Man's jean patches will testify, but it's certainly better not to put it through the washer). I used wooden shank buttons that I scored on clearance at JoAnn's, and I love them! Again, applying them to the removable straps means they won't be subjected to the washing machine, which would probably be harder on the wood than it would be on the leather.


The leg openings are bound with part of the cuff from the original sweater (free ribbing!). I opted for "hammered" snaps along the crotch, though I'd prefer a less visible snap. Still, easy diaper access and not having to wait/pay for new snaps trumps fashion. I wanted the snap closure to overlap front to back (so the opening faces toward the back), and then somehow did the exact opposite! Fortunately not a huge mistake, and one that probably only I would notice. 


Scout seems quite happy with his dungarees (not that I'm sure how he'd express displeasure with them...), and put them through their paces in short order -- getting a front view of him wearing them was challenging, because he rolls over almost as soon as you put him down! He's on the move now, dragging himself along the floor all over the house, and practicing balancing on hands and knees.


 Now I can check off "make sweater dungarees" on my bucket list (is that a strange thing to have on one's bucket list?) -- though I have a feeling I'll have another go at them the next time I find a likely candidate on the mens' sweater rack...

Wednesday, March 14, 2018

Easy Does It


I love my Ergo carrier (I bought it when Laddie was born, and have used it with him and Scout), but I do not love my babies' proclivity to chew on the shoulder straps. This is not a unique problem, as even a brief search for "Ergo teething/drool pads" will show! Tired of either washing my carrier too often (not good for longevity) or having dried slobber (or even spit up... yuck) all over the straps, I decided to make a pair of my own.


I traced the outline of the strap onto some paper, added some seam allowance, and got to work. Using some scraps of Scout's crib sheet/changing pad cover fabric, plus an unused terry washcloth as the backing, I stitched up a quick set of strap protectors. 


These were so simple that I'm wondering why I didn't try this sooner! There are some free patterns available should you need one, but I was happier with my self-drafted version. Now when they got soiled, it's a simple matter of unsnapping the pads and throwing them in the wash.

Sometimes, easy does it best!


Monday, March 12, 2018

Room

It's a never-ending quest -- pants big enough to fit my extra-large baby and his even larger cloth-diapered bum! Poor Scout has been squished into his trousers on more than one occasion. Quite honestly, even without the cloth diapers, his rolly polly thighs make the whole pants thing quite a challenge. And even if I get him into his pants, the waistband rarely makes it up over his diaper!

Happily, roomy pants (usually the European harem variety) have been gaining in popularity. Unhappily, they are generally sold by higher-end retailers. And that's where some wrapping paper, a few measurements, and a sewing machine come into play.


If I had it to do again, I'd have placed the (totally unnecessary) pocket a little higher. Live and learn!)


Some fawn-colored corduroy with a bit of stretch (purchased for another project but no longer needed) seemed just right, so I set to work drafting a pattern -- for the record, there are a number of free or inexpensive harem pants patterns on the Interwebs, but most are for knit fabrics. Besides, where's the fun in having a pattern all ready to go?! Okay, there is a certain appeal to that...

The pattern didn't take long, though, and the whole project came together quite quickly. They were a bit long at first (I tend to overestimate, because I'm terrified of making something that's too small!), but he's grown into them a bit since these photos were taken.


I don't know if Scout appreciates the extra room, but they seem like they'd be more comfortable! I love the baby wale corduroy, too -- soft, but still a bit structured.

I've got some dungarees from a recycled men's sweater underway, and I suppose I should finish those up before the weather turns warm!

Sunday, September 24, 2017

All Laced Up

"Operation Stashbust" has resulted in projects of various sizes, shapes, and varieties -- for instance, a toasty top for Rosa to wear this fall and winter. 

This cotton "sweatshirt" fabric has seen many incarnations. Originally it was used for Rosa and Laddie's Christmas pajama pants two years ago, and more recently for pajama pants for Little Man. But it was time to get out of the pajama rut, don't ya think?


I'd been toying with the idea of including lace in a "sweatshirt" design, and decided this was the perfect opportunity! I pulled out some Cluny lace from my stash (I'd actually used the ruffled Cluny lace for a skirt years ago, and then harvested it when the skirt wore out), and got to work. I drafted a pattern sloper for a raglan-sleeve top/dress a while ago (which I've used for everything from nightgowns to dresses), so I used that for this top. And, of course, what's a new top without a matching hair bow?


I had to get creative with the sleeves, because after making Little Man's pajama pants I ended up just short of enough fabric to cut them out -- instead, I divided the sleeve pattern down the middle, attached each sleeve piece with a strip of fusible interfacing, used my widest zig-zag stitch to connect them more permanently, and then topstitched the lace down the center of each sleeve. It worked out quite nicely! Necessity really is the mother of invention, it would seem.


To attach the lace to the hem, I marked my hem and figured out where the lace would need to be to have the proper "clearance." I then stitched the lace right-sides-together to the shirt before hemming, and then hemmed the shirt. The result is a normal hem (rather than attaching the lace at the hem line and ending up with either an awkwardly narrow hem, or very little lace showing). I think my lace was stitched on about half an inch away from the edge of the shirt. I don't know if that makes much sense, but there you go!


I can't wait for the weather to cool down so Rosa can wear her new top -- she's pretty excited about the matching hair bow. And I'm thrilled to have a little less in the stash!


Friday, August 25, 2017

Tweaked

I started this top about two months ago, wanting to experiment with some nursing friendly styles -- sure, you can just pull up any ol' knit top, but why not try something new? I cut it out using my self-drafted knit top pattern, making the necessary changes for a criss-cross top. However, I quickly halted the project when I realized that there was no way I could fit the top properly with a baby bump (and I strongly suspected the top would be too small until I'd lost a fair bit of baby weight). And I'm glad I waited! This top required a ridiculous amount of tweaking. In fact, after sewing up the side seams I wondered if it would ever be wearable. I'm going to blame the fabric, which is a not-very-stretchy slub knit. But it was only $1 a yard at Wal Mart, so I suppose I can't really complain!


This was going to be a basic top, with sleeve tabs as the only real feature. But as I tweaked, other details appeared. A pleat here, ties there, and a back "bow" to top it off. In the end I'm happy with the result. It works well for nursing  it's quite comfortable, and I like the style. I think I'll like it even better when I've shed a few more pounds of baby weight. *wink* I'm using it with a "half cami" -- a regular camisole that I cut off at the midriff to wear with low-cut garments -- but it would work with a nursing tank, too (the two that I have are on the thick side, so not ideal for layering under a top like this).


Besides all that, it was quite therapeutic to get back to sewing -- though I forced myself to deal with several mending/alteration projects that had piled up first! Now that they're out of the way, it's time to tackle the stash once again...