Showing posts with label maternity. Show all posts

Friday, September 30, 2022

Waiting on a Rainbow (with a little sewing on the side)

I had every intention of getting some maternity photos with this pregnancy around 34-35 weeks -- after all the heartache we've been through in the last four years, this "rainbow" pregnancy was certainly something to commemorate. And I've always regretted not getting decent bump photos with most of my babies (only Little Man has a handful of "maternity" photos, taken in my parents' back yard -- my goodness, my husband and I look like babies ourselves!). I knew exactly what I wanted to wear, the absolutely lovely "Eliza" dress from Emme Mama. The only problem was the price tag...it's hard to justify spending more on a cotton gauze everyday dress than I did on my silk wedding gown, even though it's a company I'd love to support because of their ethical manufacturing. I decided to try my hand at drafting my own dress, and even made a trial run before we moved (which was a significant help, as it turned out). 

And then our house needed more renovations than anticipated (well, not all of them were needed), and our shipment was delayed by a month... As you can imagine, sewing a new dress was hardly my top priority when our belongings finally showed up. I finally managed to squeeze in some sewing, and finished my "knock off" dress just before 37 weeks. Cutting it a bit close, wouldn't you say? Though during the delay, I remembered a local museum that has the loveliest grounds. It turned out to be the perfect setting, and we all wished we could stay longer (we were trying to find the happy medium between closing time and golden hour, so our visit was a bit rushed). I suppose we'll just have to go back! 


Back to the dress details:

Even with some experience to guide me, I had to tweak (and tweak, and tweak again) to get the fit right. After the first try-on, I had to reduce the length/circumference of the puffed sleeves and hack almost eight inches off the skirt -- which meant removing and reattaching the ruffle. At which point, I realized that the ruffle just wasn't full enough, and still a bit too long. So it was removed again, expanded to include an extra length of fabric, and re-hemmed. 


I feel a bit narcissistic posting so many photos of just me (and Kit, by default!), but I've omitted photos with my husband and children for the sake of privacy. I promise that the rest of the family was involved; the littles have been so excited to welcome a new baby to the family, and it was truly sweet to capture memories with them as we all anticipate this little rainbow's arrival.

It seems foolish to make a maternity dress only a few weeks from delivery! But it should prove a boon during that awkward postpartum stage (and beyond, for that matter); it's insanely comfortable and nursing friendly. Besides, it has a decidedly autumnal flair, so I suppose it wouldn't have been ideal for the blistering summer we've had.

I found my cotton gauze on Etsy -- the five yards I purchased yielded the dress with plenty to spare (in fact, I've already made a wee pair of Misusu Olli pants and a bandana bib for Kit with the leftovers, and still have a yard or so left). It washed up beautifully, with a slightly squishy texture. In the end, the fabric cost about a fourth of the "inspiration" dress...considerably more budget friendly.


I debated hiring a photographer for a maternity shoot, but in the end I'm glad it was just us -- I didn't need or want a whole album of photos, especially since there are only so many ways to pose with "the bump." But I did want to capture a few memories of a season that's come after so much waiting and prayer. Thanks to my in-house photographers (i.e., my husband and oldest son), a tripod/remote, and a bit of help from Lightroom, we were able to do just that. We even managed to get a full-family photo, which is a bit of a shock considering how many people and how little time we had. *wink*


It's surreal to be here, in the final days before we meet this sweet boy, Lord willing. My heart overflows with gratitude for the Lord's undeserved mercies in bringing us to this point. So many times as we walked (stumbled? crawled?) through the valley of grief and recurrent loss, I wondered if the clouds would ever part. The darkness seemed so consuming and so endless at times. It's true, the scars of loss will never fully heal on this side of eternity -- I will always be a mama missing her babies until He wipes away my tears for good. And let me be quick to say that a "rainbow baby" was not the inevitable outcome of our valley sojourn, nor the only way God could bring healing and hope to our hearts. But I am so grateful for this little life, this tiny soul who has already brought so much joy to our family. He is not a "replacement" for the sweet babies we lost; he is a precious gift entrusted to our care. A gift that we do not take for granted.

We're ready to meet you, Little Kit! 

Wednesday, June 15, 2022

Streams of Mercy, Never Ceasing

We're nearly there -- just a few more days before we start the long trek back east. 

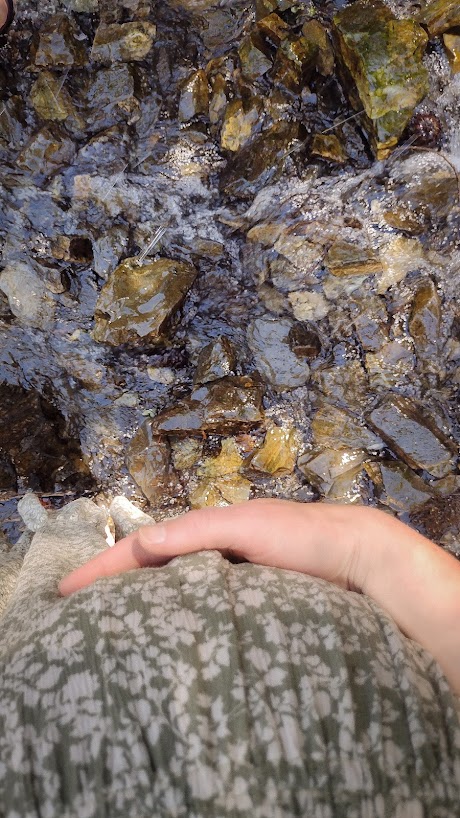
While I don't think we could ever tick every box off our bucket list, we did fit in one last visit to a favorite spot, this fairytale oasis tucked away in a nook of the desert. Of all God's glorious creations, waterfalls were one of His best ideas, I think. I never leave this place without feeling refreshed, in both body and soul.


If I look a bit hot and disheveled, that's because I was! The hike to the falls
isn't long, but it's all uphill in the sun on a toasty day. 


The water is so clear, and deliciously cool. Anything green is a novelty, and I think this is the only spot we've seen moss out here! This was probably the nicest visit yet for me, because Scout is now old enough to move about by himself -- lots of slippery rocks and a steep drop off about forty feet from the base of the falls make it a bit nerve-wracking with a toddler. This time it was more visual rather than hands-on supervision, and I could enjoy myself and the other littles more. I've just realized I've never posted about this particular spot, and I don't quite know why?


On the way back down, we met up with a local, who allowed me to get quite close before he dashed away to "safety." 


24 weeks with this little miracle. We're now at "viability," when the baby's chances of survival outside the womb climb dramatically (and continue to climb with every week). While we've never had issues with preterm birth, it's still a relief to reach this milestone. The mist of the falls and the rush of the water were reminders of God's endlessly flowing mercies, as I savored sharing this final visit with our sweet baby.


This dress must be my fourth or fifth "last project before we move." I just couldn't let my sewing motivation go to waste, and knowing that my machine will be packed up for nearly a month probably added to my desperation. Technically I did throw together a few new demi-camis after I finished this, but this was essentially my last project!


Rather than trying to do shirring on the waist,
I made a casing and used five strips of 1/4" elastic.


Using a peasant blouse pattern as a base, I drafted my own pattern. I really want to recreate the out-of-my-budget Emme Mama dreamy Eliza dress in cotton double gauze, so this was a bit of a test run (though I did change some elements to better suit this printed rayon gauze). I was worried I'd need a lining because it's described as semi-sheer, but happily it's opaque! It's the perfect maternity and nursing dress, and so, so comfortable. 

 I had barely enough fabric, since it arrived in two two-yard pieces. The ruffle ended up a bit shorter than planned, but in the end it all worked out. I did do a fair bit of tweaking after the fact, because I think I overestimated the sizing a bit -- it's hard to know how big the bump will get, you know? I do wish I'd put the waistband a bit higher, but I decided to leave it; not only was the elastic a nightmare to feed through, but I think it will sit perfectly fine post-bump. As a seamstress I have to remind myself sometimes that if I bought a dress off the rack, it probably wouldn't fit just so. Being able to tweak and tailor is a bonus when I've already reached my goal of a wearable garment. If I do get to make a double gauze version, I'll have that much more knowledge under my belt.


And now, I suppose, I should really get back to the finishing touches before packers arrive tomorrow...


Friday, June 03, 2022

Resurrected

About two years ago, I made a maxi dress out of this dusty rose rayon jersey -- and it was an utter flop. It was inspired by the empire-waist maternity/nursing friendly dresses I'd seen, but my design just didn't work. Perhaps I can blame the unexpectedly, excessively stretchy fabric? The flutter sleeves were far from flattering, the weight of the skirt stretched the bodice too far, the ruffles on the v-neck weren't proportioned right, and the high-lo hem just looked odd. I wore it once, shortened the bodice (which actually made it too short, ugh!), wore it once more, and then let it languish in my closet. As the rainbow pregnancy I hoped would be right around the corner turned into a series of miscarriages, there seemed little point in bothering with it.

Early this spring, I realized that I still had a yard of material left. All the dress really needed was a new bodice, and surely I'd have enough for that.

I pulled out Butterick 5242, a pattern I've posted twice on the blog before (here and here) but I've actually made five times. You can see one I made two years ago in my 16 week bumpdate photo, but the other two don't have pictures yet -- one is new, and the other is at least three years old. 


20 weeks with little Kit


This dress definitely needs a neckline filler, but that's part of what makes it nursing friendly. My favorite option is a "demi cami," essentially a tank top cut off at the midriff (you can see a photo if you scroll down in this post). I don't mind wearing them, as they don't add much bulk or warmth, and they certainly expand my wardrobe options. I actually need to make a few more, as several of mine are well past their prime. 

The skirt is salvaged from my maxi dress, so this is my most "unique" version of this pattern -- though I actually stayed closer to the pattern for the bodice this time. Most of my versions have been sleeveless, with self-drafted facings for the armholes, but I decided to use the sleeve pattern (shortened, I think?) for this dress. I don't like the look of the sleeves on the pattern cover, but I think the lightweight fabric helps. I'm also happy with my decision to actually line the bodice, rather than face the neckline edge like I usually do. The latter works well for more structured knits, but this silky jersey needed some extra oomph. The waistband is also double-layered, to help support the weight of the skirt. 


I redid the original hem to make the high-lo a bit less dramatic, and also shortened the skirt a bit. I think the length was part of what made it look odd before -- though, you can't judge for yourself, as apparently I was disappointed enough with the first version that I never took photos of it!  

This dress hung in my closet for a few weeks before it was ever worn, due to our very chilly spring. I thought it would be quite appropriate to wear on "Resurrection Day" (Easter), as the dress itself was resurrected -- but Kit's gender reveal scan the day before called for a blue dress, instead. *wink* I'm not sure if this will make it all the way through nine months of pregnancy, as my bump already feels ominously large, but it's quite comfortable now and should be perfect post-partum. 

Not all sewing flops have happy endings, so I'm grateful this project had a chance at redemption.

Friday, May 20, 2022

Pleiades, If You Please

After my success with my first Pleiades dress, I was determined to make another one. By the time I got around to it, there was a baby on the way -- no problem, the Pleiades is quite maternity friendly! But I still made a few alterations to ensure that I'd get as much wear out of it as possible.


Sixteen weeks with our rainbow in this photo 


I had quite a bit of blue tencel blend left over from my Brumby skirt, and with some careful placement I was able to eke out all of the pattern pieces. Granted, even though I lengthened the skirt pieces, this Pleiades ended up a bit shorter than my last one. I typically prefer longer skirts, and it does feel strange to have my knees showing! It doesn't help that it's insanely windy here, an issue that I'm looking forward to leaving behind when we move in a few weeks. The night before I wore this dress I hacked a pair of nylons by cutting off a few inches from the top and sewing on a bit of salvaged maternity panel -- it took all of five minutes to do, and was far cheaper than buying maternity-specific nylons. Somehow wearing sheer nylons makes me feel more covered? Anyway.

I sized up a bit for this dress, as my original Pleiades -- which fit perfectly when I made it -- is a bit snug around my ribcage now due to pregnancy (I already have a "generous" ribcage, but pregnancy expands it even further!). Not unwearable, but why not make this one a bit roomier if I had the option? Besides that, I made few alterations:
  1. I shortened the bodice, to allow more room for the bump. 
  2. I added a few inches of width to the skirt front, also for the bump! 
  3. I raised the neckline, a carryover from my original dress.
  4. I transferred the invisible zipper to the center front seam, making this dress nursing friendly. I was concerned about how this would work, but it turned out beautifully! 
  5. I needed a way to conceal the zipper tab, so I added a bow to the neckline. It's essentially a long rectangle of fabric sewn into the neckline, and wasn't too difficult to work out (similar to sewing a sash into a waistband, just around the neck instead!). I like how it echoes the ties on the sleeves. Actually, I just noticed that there's a similar option on the Pleiades 2 pattern.


I almost always add ties to the sides of dresses, whether they are in the pattern or not! I don't have to tie them tightly, but if I need some extra shaping they're invaluable. 


We took these photos on Easter, the day after our gender scan for little Kit, as an announcement for family (it's hard to believe that's over four weeks ago...). Actually, this dress had been hanging unworn in my closet all spring due to unseasonably cold weather, and it just so happened that I also had a new pink dress in my closet -- I decided I'd wear whichever dress corresponded to our baby's gender for Easter. Obviously, we're team blue!


Brothers!


Apparently spring is (still) having a bit of an identity crisis, so I've not been able to wear this dress since Easter (and that pink dress hasn't been worn at all yet!). But once the weather cooperates, I'm hopeful this will be a closet staple in the coming months/years. What a blessing and joy to have a "bump" to dress again, and lovely fabrics and patterns to dress it with! 

Saturday, March 18, 2017

Stashing the Bump

As my waistline has expanded with this pregnancy (pretty much as soon as I got a positive pregnancy test, it seemed! *wink* ), I've ended up wearing the same few skirts over and over again -- mostly my black and charcoal grey maxi skirts, with a few other "stretchy" options thrown in! I had one denim maternity skirt from my last pregnancy, but pickings were slim. And while I do wear my maxi skirts to church, I really wanted a dressier winter option. 

The Stash provided -- yards of a mystery grey fabric, purchased ten years ago (I'm embarrassed to admit!) at Colorado Fabrics. It was a steal of a deal, if I remember correctly! For years I had plans to make a tailored jacket and a skirt (with godets or a flare at the bottom). But marriage and babies followed shortly, and the fabric has been sitting in my stash ever since.

Now most of it is in my closet!


This is the easiest skirt in the world -- Simplicity 2655, cut to the longer length (without pockets or the waistband yoke). Six seams and a hem, plus a stretchy waistband. No closures needed, because it's just big enough to go over my hips. 

Speaking of which, my pregnant hips are a bit wider than Yvonne's, so the fabric actually lays flatter on my torso than on hers (you can thank me now for taking the picture on her instead of me! Ha!). I used my favorite maternity technique, the "harvested" stretch panel from a pair of thrifted maternity pants. Seriously, I love these panels. They are seamless, "hemless" (at the top, I mean -- less bulky, and less visible under shirts), and fit from early pregnancy through the third trimester. And beyond! In fact, I use these on all of my maxi skirts now, because they hold up well and make a truly transitional garment. This "natural" color is my favorite, because it doesn't show under light-colored tops, but they come in black, navy, and even brown. I frequent the mark-downs at local charity shops to score them for under $2. They're usually longer in the front than in the back, but I cut them "even" for simplicity's sake -- and it helps with that transitional aspect, because you can just wear it a little higher on the waist for post-partum use.


This has served me well this winter; I'll be sad to put it away with Spring fast approaching! I still have a bit of my grey fabric left, and I'm thinking it will be perfect as a little skirt or pinafore for Rosa -- next winter...

Thursday, February 16, 2017

Time to Knock it Off

I recently found a black thrifted top made by Old Navy, which has quickly become my favorite maternity top! Not only was it perfect as I was transitioning into maternity clothes (that lovely "normal clothes don't quite fit, but neither do maternity clothes" stage), but it's just an all-around lovely top. I love, love, LOVE the ruching/gathering in the front, and find the overall shape to be quite flattering -- flowy, drapey, and probably perfect for post-partum because it hides a bit of bump and will work well for nursing. Plus, it doesn't require a modesty panel (though I did have to stitch up the neckline just a bit). 

The only problem? Just one. This is a top I'd love to have in multiple colors! I even searched my favorite second-hand clothes sites for more of the same style in any color, because I'd have gladly bought another one (or two!) in black. I know I will be wearing this top out in short order (based on how frequently I've worn it already, and I'm not even half-way through).

The only solution? Knock it off. But this top was no picnic to figure out! The front alone seemed to be constructed of three separate pieces, of undefinable shape. 

But in the end, I was determined enough to find a solution -- and here it is!


See that little "bar" across the center ruching? It feeds through to the wrong side of the bodice front (it's a circle/ring), so by carefully cutting the stitches from that bar on my original top, I was able to remove it and make sense of the construction. Turns out, the bodice is only made from two pieces: 


Looks bizarre, doesn't it! It was still a bit of a pickle to work out the pattern, and it's just as crazy to put together (though not actually difficult). I would never, ever, have guessed just from looking at this top or trying to figure it out without removing the fabric tab. It's so very clever -- I like this top even more now that I know the "engineering" behind it! 

My original mock-up was a slightly heavier striped jersey (I had yards and yards of it, so thought it would be good for experimenting). As I suspected, the construction method for this top makes black-and-white stripes just a bit overwhelming! However, it helped me work out a few kinks and decide upon the best construction process, and the striped version is now a favorite pajama top. 

This second top went together in no-time-flat, and construction was even easier. I used a pink jersey I picked up for just over $2 a yard when the local Hancock's went out of business. It's the perfect weight for this top -- and I have more in a minty green! 


The original top had gathering along the front and back shoulder seams, but I opted to just gather the front -- it simplifies construction! You might be able to see that the back neckline is bound, but the front neckline doesn't have any kind of hem -- it's an ingenious folded-under detail that gives a lovely, "stitch-less" finish to the front neckline.


And here's a view of the side. I have one more final edit for my pattern (I'd like to adjust the angle of one seam for what will hopefully be a slightly better fit), and then I hope to eventually transfer it to a printable format and put it up on the blog -- for free of course, because I like you and because this is a knock-off instead of an original pattern! *wink*


It's lovely to have another staple in my maternity wardrobe -- to pair with cardigans now, and to wear by itself as the weather warms up! Speaking of which, I'm going to have to do something about my skirts soon, because Spring is almost here...


Monday, February 23, 2015

The Last Maxi

A few weeks ago, I whipped up the last maxi -- well, the last maxi skirt for this pregnancy, anyway! Maxi skirts are so fabulous for transitional clothing; they span normal, maternity, and post-partum wardrobes with ease!

My dear mother knows me so well. She did not buy me a maxi skirt. She did not buy me fabric with which to make a maxi skirt. She bought me a knit dress that I could upcycle into a maxi skirt! She found a rather hideous J. Crew "tube top" dress at a local charity shop, and saw the potential at once. The color of the fabric is gorgeous -- it's a bit more muted than it shows on my computer monitor, and has a lovely hand. It's actually been in my stash for months; I'm still not sure why it took me so long to tackle this, since it took all of 15 or 20 minutes to complete.


Baby bump at just shy of 35 weeks!

After cutting off the bodice, I gave the rectangular skirt a bit of an A-line silhouette and attached a waistband. I ended up using one of my salvaged lycra maternity panels, trimmed down to about 4" (in other words, eliminating the curved bit in the front). The panel is beige, which actually makes it less visible under a white top than a self-fabric waistband would be. And hurray for pre-existing hems!

The white ruched tank top is one of six by Oh! Mamma that I bought this pregnancy (two white, and one each in black, grey, fuchsia, jade, and burgundy) -- they've been life savers, and are perfect for layering with non-maternity cardigans! This particular cardigan is by Style & Co., and was a clearance find at the Navy Exchange -- my mom gave me one in a lovely mocha/mushroom color for Christmas, and I decided I'd like one in charcoal, as well. They're super comfortable and have a nice feminine look. I love using non-maternity pieces whenever possible! I've done that more with this pregnancy, and I'm looking forward to (hopefully) less wardrobe drama in the post-partum stage. Of course, all of my winter layering pieces will have to "hibernate" during our stay on Guam...

At any rate, I'm enjoying this latest stash-reduction/wardrobe amplification!

Thursday, October 30, 2014

A Maxi for Mama

It became very apparent to me a few months ago that some closet upgrades were well overdue! I've been very excited this pregnancy to try maxi skirts -- they came onto my radar just after Rosa was born, and I wish I'd known earlier how comfortable and transitional they are. Pregnancy, post-partum, "normal" -- it's all the same to a skirt with a stretchy waist.

Here's a version I whipped up with a coral knit from Girl Charlee. I used a beige maternity panel salvaged from $1 thrifted pants (I routinely harvest panels to use on skirts) for the waist, but cut off all but the top four inches or so. In essence, it has a stretchy waistband that can sit below a large belly, or right at the waist post-pregnancy. 


I also tried out a detail that I'd been musing over for a while -- a ruched, off-center "drawstring" at the hem, for a little extra flair. I really like how it turned out, and it was quite easy (thanks to knit's no-ravel policy). For a solid skirt, I think it adds a nice touch.

My two "pre-pregnancy" maxi skirts, are working just fine, and I re-made two XXL maxis that I scored on clearance at Target -- the fabric is great and the price was right, so I'm glad I went to the trouble of scaling them down! I'm really looking forward to less "drama" in that awkward no-longer-pregnant-but-still-don't-fit-in-normal-clothes stage. But right now, I'm just enjoying being pregnant -- speaking of, a recent scan showed baby doing well, moving like crazy, and measuring a full week ahead. That, combined with the crisp weather, has left me with a spring in my (admittedly waddle-prone) step.


Monday, August 20, 2012

Lace, At Last

Before I was married, my then future mother-in-law brought back a few yards of lace for me from Puerto Rico. Beautiful, creamy lace, perfectly feminine without being too "girly." That lace has been languishing in my stash for probably three years now, waiting for the perfect opportunity.

And last week, that opportunity came knocking.


Finally in the 3rd trimester! It's still too soon to start counting down the days... 
But I am. *wink*

After realizing that I can't sew all of my maternity tops from my tunic pattern (well, I could, but it would be rather boring), it was time to come up with something else. Starting with a blouse pattern that was *not* darted in the side seam, I tweaked and fiddled until I had a custom sleeveless top. Just two pieces -- front and back -- with endless possibilities for variation. The front neckline can be pleated or gathered to take in the fullness required for wearing ease. The simplest finishing option is a bit of bias tape around the neckline and armholes. A simple hem and a belt, and it's done!

But this blouse needed something more.

More, as in a false placket, mother of pearl buttons, and self-fabric ties. Oh, and lace. Lace, at last!


The fabric is a cotton shirting that I bought at JoAnn's, after waiting patiently for a 50% off Red Tag sale. I love the woven stripe-and-diamond pattern; it's subtle, but adds a lot of texture. I think I intended it for a Regency gown at the time, but it's been several years and I don't foresee making one any time soon.

The lace is a perfect match, tucked into the placket and into the self-bias around the armholes and neckline. I opted for a gathered neckline for this blouse. Two fabric ties are concealed under the placket, providing just enough shaping. I'm finding in this pregnancy that I much prefer "shapeless" tops that can be cinched in with a belt of some sort. "Permanent" waistbands (whether elastic or not) have a tendency to be too tight, too loose, too high, or too low. Already I need to re-do a belt I made earlier in my pregnancy, as it's become a bit too snug around the ribcage to be comfortable while I'm sitting!

Little did I realize that this post would turn out to be quite the process:

  1. Make blouse
  2. Make beige camisole to wear under blouse (to conceal navy blue maternity skirt panel)
  3. Iron blouse
  4. Set up camera on tripod
  5. Go back in the house to get the camera remote, which the baby made you forget
  6. Take pictures
  7. Check results and take more pictures
  8. Tote camera and tripod back into the house
  9. Rub Tiger Balm on the seven mosquito bites acquired in as many minutes while taking pictures outside 
  10. Upload, edit, and resize photos.
  11. Write blog post. Though I'm considering including this with Step 10, just because an even ten is so nice. Oh well. At least eleven is symmetrical.


Anyway, there's another incarnation of this blouse (linen and flutter sleeves!) just waiting to be worn and photographed. And considering that I'm getting closer to the finish line, I think it might be time to stop making maternity blouses. Unless I can't resist, that is. 


Monday, May 28, 2012

Maternity Tunic, Take 2

Well, the trials are complete. My 2nd version of my maternity tunic worked splendidly, and I'm ready to call the pattern finished. It's been traced and uploaded, and is now awaiting the finishing touches. And the instructions are done, minus the illustrations (I dread writing instructions, since I tend to try too hard to explain *exactly* what I mean). 


Look, Yvonne is expecting, too! *wink* This is my attempt at a "pregnant" dressform. Ahem.


I've been wearing this tunic all day, and it's so comfortable! I did take it off to add some belt guides (which I was too lazy to do when I made it), as the belt was having a tendency to sag. You can see a bit of the "sag" in the picture below.


A bit of braided embroidery floss has solved that issue, and the belt now sits a few inches higher with no finagling required. I love that this style flatters the figure, without being too tight, too revealing, etc. And while the armholes are a little "cut in," so far I've no problems with rogue straps making an unwanted appearance! Plus, the neckline doesn't gap, which is a huge plus when you're wrangling a toddler.


I've had this fabric for probably ten years. It's actually from a Talbot's skirt that I bought as a teenager -- even a decade ago it was outdated, and far too old a style for me to wear. I don't have any clue what I was thinking! But I loved the fabric, and the skirt had plenty of it. This is seriously the first time I've ever worn it. *wink* The contrasting white is a scrap of linen-look I had in my stash (just enough!), lined with white cotton muslin.


I have a few more fabrics to try this in, and I want to do a photo tutorial on constructing the garment, to go along with the pattern. Since I foresee making a bevy of these, taking a few pictures along the way should be easy. Seriously, this top goes together in under two hours. I'm also going to lengthen it and try making a dress. The lower hem is already wide enough to accommodate hips and a baby belly, so I think a little extra material will be all that's needed for a dress conversion. If it looks wonky, I'll just shorten it back to tunic length!


So hopefully I can finish this pattern up in the next little while, and get it all ready to download!


Thursday, October 21, 2010

Simplicity 3750 -- Maternity version

When I saw Simplicity 3750 on the "to-sew list" over on the Hooks-and-Needles blog (you can see "Elinor's" lovely completed version of it in this post), I knew at once that it would be a perfect maternity pattern! While I've been loving the peasant tops I've made, I wanted to branch out into something else -- sleeve options are rather limited with raglan sleeves, after all.

And here was the pattern I was looking for -- a pattern that I've seen in the Simplicity book for so long, but never purchased for some strange reason. The empire waist and the sleeve variety (I love that it has a "half cap" sleeve and a full set-in short sleeve; most patterns seem to have just one or the other) were perfect. And most importantly, it looked easy to alter for maternity. I was so impatient to get it that I came closer to paying full price for a "Big 4" pattern than I have in years! Fortunately, JoAnn's had a sale on Simplicity before I gave in to temptation. *wink*

Here's a picture with my lovely mum (now a very excited grandmother!):


All I had to do was add several inches to the front "skirt" piece, and there you are! I found the instructions a bit vague at times -- mostly because I prefer to *not* follow the instructions at all, and I did have to pay attention the first time around. The belt attachment is quite unique, in my opinion -- it's sewn between the bodice and skirt in the front, but is detached in the back to allow for fitting. Very nifty, and it also makes it easy to add fullness to the front skirt without losing the proper dimension of the waist. For this blouse, I made the waist ties considerably narrower than the pattern.

Now the bodice -- that was a different story! Just by holding up the pattern piece I could tell it would be far too immodest for my taste. So I added several inches, and ended up making some unique alterations to get the right fit. Even then I felt a bit uncomfortable, so I added a lace panel which did the trick nicely.

For the sleeves, I skipped the buttoned armband (I didn't need it, and didn't feel like going to the extra work!), and just gathered the sleeve into a regular sleeveband. Easy and effective. I love this sleeve -- it's feminine, but not enormously puffy!

**********

Here's my second top, from the same pattern --


I added even a bit more to the skirt front, and made a new bodice piece that raised the neckline enough. In the original pattern, the bodice has a main panel across the front, and a piece on either side that continues to the shoulder. Those side pieces I adjust to connect at the waistline. This improved the fit of the neckline, but it did something wonky to the armscye -- hence, a sleeveless shirt! *ahem*


I finished the edges a bit differently than the pattern, since I wanted to make use of the black contrast fabric I had for the sash.


I still want to fiddle with the bodice -- I'd love to get it to the point where I can just put the pattern together without fiddling about and making minor alterations. Other than that, this pattern is simply wonderful!


Another winner for the maternity closet, and a pattern I'd love to use for my "regular" wardrobe, as well!

Wednesday, October 13, 2010

Maternity Skirt Pattern -- Simplicity 2655


I purchased Simplicity 2655 a few months before the wedding, and was just thinking about trying it out this Spring when I found out I was pregnant. So I put it back in my pattern stash, knowing that I'd only get a month or two of wear out of it before packing it away for the rest of the pregnancy.

But as I started making/modifying clothes for maternity, I realized that this pattern would probably work very well, due to the yoke at the waistline. Sure enough, by just omitting the yoke pieces and replacing them with one of my "camisole maternity bands," it's perfect for maternity.

I was in desperate need of a khaki skirt, so I used view D and omitted the yoke and sash pieces. The pattern goes together very easily (though it uses a lot of fabric!), and I was quite pleased with it.

(These pictures were taken about a month ago, so I've "expanded a bit" since then!)


The knit I used is not super-stretchy, so I ended up adding clear swimwear elastic to the skirt/knit seam, and a casing at the top.

I really wanted to try the adorable pocket from this pattern, but thought it might be too much on the flounced version. So I pulled out some black Tencel that I bought at JoAnn's for $2.50 a yard and made another skirt in view A. This skirt was even easier than the last, since it didn't have flounces.


I used a thrifted black exercise top with plenty of Lycra for the band, and it works beautifully! The hem of the shirt is actually the top of my band (not necessary, since knit doesn't ravel, but it does look nice). The pocket construction is a bit unusual, but not overly complicated. I just love the ties on the pocket! Though I think I might put a few stitches in my knot, since they tend to come undone over time.


I'm officially of fan of this pattern, and hope to use it more in the future -- in both my regular and maternity wardrobes!

Sunday, September 19, 2010

Sewing Maternity Tops


The most obvious solution for woven maternity tops is the empire waistline! Perfect for accomodating a growing baby bump, while working well both early and late in the maternity stage. And personally, I appreciate the easy, adjustable fit of peasant-style tops.

So far I've tried two empire waist patterns for maternity tops -- the first being McCalls 5039 (which I also used to make this dress).


The fabric for this top came from a Regency gown I made about five years ago -- it had been snug for a while, and I decided that it probably wouldn't fit post-pregnancy, anyway! So I salvaged a blouse from the skirt sections, and it has turned out to be very handy in my wardrobe. Again, changes from the original pattern were simple bias-binding casings for elastic, and an "extended" bodice divided by another casing.


Next came a cream top from the same pattern, this time cut from a thrifted Egyptian cotton sheet (which also provided me with fabric for a previous blouse and the binding for the blouse above). It's hard to find thrifted maternity clothes -- and virtually impossible to find anything in white or cream that's unstained (not to mention in the right size!). I thought it was a bit bland, though, so I dressed it up with a lace flower pin.


I noticed that the raglan sleeves on the McCalls pattern were a little binding, and decided to look for another pattern that had more sleeve versatility (and maybe a bit more room in the tummy region!). So I pulled Simplicity 5582 out of my costume pattern collection.


This fabric is in its third "incarnation," but this is the first time it's been worn! I made a Regency drawstring dress from it shortly before our trip to England a few years ago (and yes, I know it's not remotely correct for the Regency time period -- I just like it), but was unsatisfied with the fit and left it at home. Later on I re-cut the skirt for a flat-front Regency dress and cut new bodice pieces, but never got around to making it. So after several years of waiting, it has emerged as a maternity blouse (though it still hasn't escaped the empire waist!).


I can't actually recall if I raised the neckline on this pattern, or just pulled the elastic a bit tighter -- but either way, it's much more modest than the pattern cover would imply! I shortened the sleeves due to fabric constraints, but would love to try the 3/4 version, and maybe even the "double-puff" version for Fall and Winter. The armscye is certainly looser than the McCalls pattern, but is also quite puffy -- which works for this blouse, but is something I might try to tame in the future. I marked the empire waistline once the blouse was assembled, which resulted in a rather strange and not-at-all-straight line for the casing -- but it works perfectly, and that's what matters. Fortunately I strayed from my norm by actually *marking* that line on the pattern piece, so I'll be able to repeat it!


I'm hoping to tackle a little more sewing this week -- though my wardrobe is finally reaching the stage where I don't have to plan carefully what to wear so that I don't run out before the next laundry day! *wink*

Tuesday, September 14, 2010

Four Easy Maternity Skirts


Once I started outgrowing my normal clothes a few months ago, I started searching for easy maternity options. I browsed online maternity stores, but even the least expensive options (like Motherhood maternity) were still too pricey for this miserly shopper.

I did some searching and found some simple ways to modify skirts for maternity -- I particularly liked Hannah's very helpful posts here and here.

So I scouted out our local thrift shop for stretchy camisoles. They happened to have a sale the day I went, so all of the clothing was half off their normal price of $1! I went a little crazy, but at 50 cents per garment, it's hard to go wrong...

This burgundy floral skirt came from a dress that I made about four years ago and hadn't worn in ages. The dress was destined for destruction, but no longer! I cut it off at hip level, cut the bottom hem and above-the-midriff off my camisole, and stitched the two together with a zig-zag (stretching the cami as I went). *So* simple.


This denim skirt has been sitting in my closet for a year or two, making me feel very guilty -- this is its third "incarnation," since it started out as a (very-cute-but-too-big) Liz Claiborne wrap dress. I modified it into a skirt, but wasn't really happy with the results. Now, thanks to some knit from JoAnn's, it's a maternity skirt!


This thrifted denim gored skirt was a staple in my closet for several years. When it developed a strange faded line about three inches down from the waist, I sadly removed it from my closet (but kept it to use as a pattern). It turns out that the faded line was exactly where I needed to cut to add a maternity band! I love happy endings. *wink* This band was made from a navy camisole.


I actually made this skirt for maternity, but I used scrap fabric to make it. It's my favorite A-line pattern, cut off at the hips. The fabric was leftover from another skirt I'd made, so I had very little to work with. I made the skirt as long as possible, then serged the bottom edge. Using the final scraps, I cut several 5" wide pieces sort-of-on-the-bias to make a pleated ruffle.


After pinning my pleats in place on the skirt, I zig-zagged about 1/2" below the top edge of the ruffle. To maximize length, I left the top and bottom of the ruffle unfinished -- after one wash, they have a comfortably frayed look, but since they're not cut on the grain they won't ravel too much. The stretchy band is more of my JoAnn's knit (I couldn't find any khaki camisoles) -- but 1/2 yard was only about $2 on sale, and I was able to cut enough for four maternity bands.


All of these skirts were basically free, not counting the few pennies I spent on camisoles/knit, thread, and some elastic at the waistbands (more on that later). And that's important to me -- five regularly-priced items at Motherhood Maternity would be about $100! While I certainly hope this isn't the last time I'll be using a maternity wardrobe, I didn't want to invest a lot of money on clothing that will only be worn for a few months.

So you can expect more maternity make-overs and suggestions over the next few months, as I try to build a frugal wardrobe!